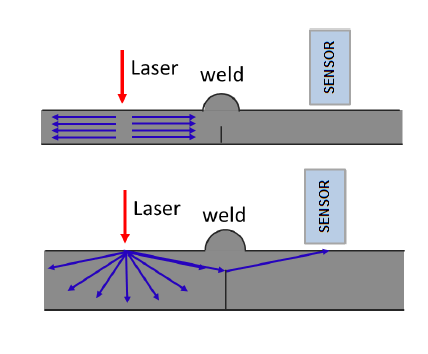
Inventors at Georgia Tech have developed a fast, efficient, non-contact, and non-destructive technique for measuring weld penetration depths in thin structures. The technique utilizes a laser to excite broadband Lamb waves from one side of a weld seam and a receiving sensor to detect signals from the other side. During the inspection process, the laser–sensor pair moves along the locations. The signal acquired at each location is converted to its time-frequency domain, and an algorithm was developed to calculate the transmission coefficients of different laser-generated Lamb waves based on the individual signal. A neural network is then used to accurately predict the weld penetration depth at the location where the signal was acquired. The developed algorithms used to calculate the transmission coefficients and neural network are computationally efficient, which makes the developed technique suitable for real-time (, on-line) and off-line inspections.
- A fast, efficient, non-contact, and non-destructive technique for measuring weld penetration depths in thin structures
- The developed algorithms are computationally efficient, which makes the developed technique suitable for real-time and off-line inspections
- Can be used with a variety of welding processes
- Can be integrated into robotic welders to achieve closed-loop control of the welding process
This invention has a wide range of commercial applications, including the weld quality inspection of pipelines in power plants, chemical plants, and the oil and gas industries. It can also be applied in automobile and ship building industries to monitor and control the welding quality of robotic welders in real time. The application of this technique is not limited by the type of welding process.
Welding is a metal-joining process in which two or more pieces of metal are fused together, and it is utilized for various materials across several industries. The weld penetration depth is a key measurement of weld quality, because it directly affects the strength of the weld. However, the weld quality cannot always be sufficiently determined visually, and cut-checks are inefficient, destructive, costly, and operator dependent. This has led to the development of a non-destructive inspection technique to evaluate the weld quality of the fabricated structures.

